I have been tinkering around with Windows Azure using Visual Studio 2010 and I am finding that more and more of the articles you find on the internet are either outdated or just wrong. This is very well likely due to the fact that things have changed over the course of the last year or so with Windows Azure. Here is the steps I took to get my app actually published to Windows Azure, hope it helps.
I am not going to go into the creation of the app, just the publish part of it, there are tons of examples out there that go into details of how to create your app and there are several example apps you can download as well. You have to make sure you have a Windows Azure account of course to go through this tutorial I have here as well, again, pretty self-explanatory.
The first thing to do is open your project in Visual Studio 2010 and right click on your Azure Project and click on Publish:
The next step you will see a screen like this:
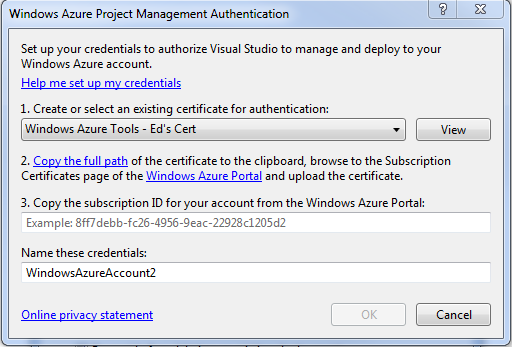
You will need to create a Certificate by dropping down the Credentials dropdown and then hitting “New”, that will bring up a screen like this:

You can make your certificate in this screen and then use the “Copy the full path” link there to get it copied to the clipboard and then you will also need to get your subscription ID from the Windows Azure portal, you can find that under “Hosted Services” under the right hand pane in the “Subscription ID” box. When you get that created, you can click on ok and you are almost ready to publish your app to azure.
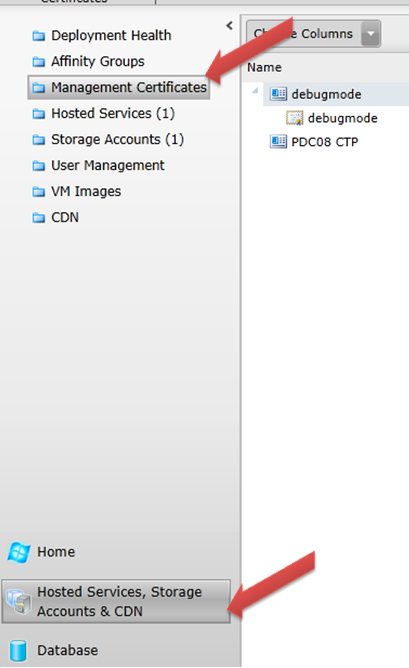
Before you click OK on the next screen, over in your Azure portal, you need to make sure to upload your certificate to Windows Azure so that your app will be authenticated with the server. In the azure portal, locate the “Management Certificates” under “Hosted Services, Storage Accounts and CDN”, click on that and you will see something like this below.

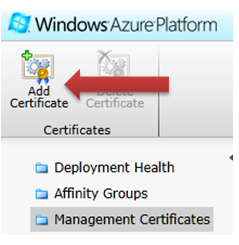
Then just click on the “Add Certificate” button
and you will see a screen like this one:
Your subscription will have been chosen assuming you have already taken care of all of that before by signing up for azure, you then click on the Browse button and then paste in your directory, you will probably have to clear out the certificate key filename to allow you to open the directory to choose the file, then ok that and then ok this screen and you will have your app authorized for azure.
Finally you can go back to studio and click on your ok button to publish your app to azure, it does take a while and the progress of the publish will show up in the lower section of studio in the activity log.


