How to use the Require.js Optimizer

December 7th, 2012 by admin No comments »

As the HTML5/Javascript application I am working on comes to a close, it was time I started looking at how to speed up and optimize the site for all the devices that will be hitting it.  I started looking around and I found things like Uglify: https://github.com/mishoo/UglifyJS, which does a good job of minifiying your javascript but was still missing some things I was needing, its mainly for just optimizing a file, not a set of files.  I also came across Grunt.js, which I spoke about in an earlier post, but for now, Grunt does a few extra things I am not really interested in, like Linting and running tests, I should probably use that library down the road but for now I am liking the Require.js optimizer found here: http://requirejs.org/docs/optimization.html.  Basically to use the optimizer, you just create a directory somewhere in your app and grab the r.js file found here: https://github.com/jrburke/r.js/, install node from here: http://nodejs.org/download/ and then place a build file inside there and you will be ready to go, they have a lengthy example of a build file found here: https://github.com/jrburke/r.js/blob/master/build/example.build.js#L27-35.   That file will show you a lot of the features, probably way too many that you don’t care about so I have attached the file that I ended up using that does the job.

01({
02    baseUrl: "..",
03    dir: "../../appdirectory-build",
04    paths: {
05        "text": "Lib/Require/Plugins/text",
06        "bing": "empty:"
07    },
08    mainConfigFile: '../Main.js',
09    preserveLicenseComments: false,
10    removeCombined: true,
11    modules: [
12        //First set up the common build layer.
13        {
14            //module names are relative to baseUrl
15            name: 'Main'
16        },
17        {
18            name: 'Path/To/EntryPoint',
19            exclude: ['Main']
20        }
21    ]
22})

Some explanation here, the baseUrl in my example is just the directory relative to where my “Scripts” folder would be, or the folder that contains all my js/html files.  The dir is where you want all the optimized files to go, the paths is just for libraries that you want the optimizer to handle for you, for example, we use the bing control, which is located on the web and the optimizer won’t compile it so I am telling it to ignore it during the build with the “empty:” string.  The optimizer also has issues with the text plugin for require so I have that in there as well.

If you make use of the mainConfigFile, you won’t have to include all the paths to all your libraries, the optimizer will handle that for you, this is just a pointer to your Main.js file, I highly recommend using that and not duplicating all that.  If you set  preserveLicenseComments to false the optimizer won’t keep all the comments in your libraries, resulting in much smaller files.  Setting removeCombined to true removes all the files the optimizer uses to create your files, resulting in a much cleaner output directory and shows you potentially which files are not being used.

The modules section is what I like to call the “Entry Points” of your application, of course the main entry point of the application is “Main.js” so you naturally have to include that one.  Then you will notice that I have the next module just a path to an entry point.  If for example you have a site listing cars, if you have a link that kicks off a view that lists cars, then you would want to include that view, which would tell the optimizer to also go grab any other dependencies and views that are being used by that, it will take all of that and wrap it up into a single file, thus reducing greatly the amount of HTTP requests the application has to make and increasing speed tremendously.

To kick off the optmizer, just open up a command window on windows and type this in once you have node installed: node r.js -o app.build.js

I hope this helps somebody struggling with the optimizer, I spent a few days with it getting it exactly where I wanted, please feel free to ask questions, I will do my best to get back with you.

Using grunt.js on a windows machine.

November 27th, 2012 by admin No comments »

I have been doing some research on some tools to automate the minification and testing and whatnot of my javascript code and I came across grunt.js found here: http://gruntjs.com/.  This library looks very promising and simple to install via npm with just “npm install -g grunt” and that places it globally in your system ready to use in any project.  All you have to do is have a grunt.js file located in the root of your project and then open up a command line in windows to execute it and it will do its thing, only in windows the “grunt” command actually opens the grunt.js file so what you have to do in windows is  type grunt.cmd instead.  I hope this helps someone out, it cost me a little bit of time trying to figure that out.

My new Samsung Chromebook

November 20th, 2012 by admin No comments »

For Christmas I ordered myself a Samsung Chromebook, which is a cloud-based net book for those that don’t know.  So far I am really impressed with the thing.  I couldn’t really figure out what to get for Christmas this year, I have a Kindle Fire and I really like it, its perfect for reading and occasional web surfing, but I am just not a big fan of soft keyboards, they just aren’t where I would like them yet.  The Samsung Chromebook has a very nice keyboard that I have used and as a developer it is very quick to type out lots of of code or write a document for a blog like this one.  So far it is exactly what I was wanting that wasn’t so large and heavy to lug around and flexible enough to get work done on, with a nice price of $250.

I have already enabled developer mode on it so I can get access to the command shell and execute Linux commands on it, which I know very little about but have plans on learning a lot about down the road.  I will be posting about how to get it to developer mode in the coming days, so stay tuned.  I personally think this is where computing is headed, it makes too much sense, we are pretty much in the day and age of throw-away devices and this device is one.  I have already accidentally factory-reset this device and it didn’t matter because all my data is stored in the cloud, I just logged back in and I was back where I started.  It starts up in around 6 seconds, gets updates every 6 weeks or so and the battery lasts at least 6 hrs.  I will also be posting my favorite apps I have used so far, so stay tuned for that as well, if you are on the fence about one, I highly recommend getting one, you won’t be disappointed.  I think Google has hit a home-run on this device.

Little known webkit feature

November 15th, 2012 by admin No comments »

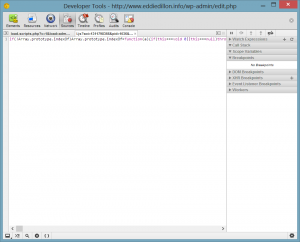
Have you ever come across some minified javascript and though, “Man, if I could only read that!!”  Well, fret no more, the webkit in chrome has a handy-dandy little tool that can take that ugly script and bust it out for you in neat, beautiful javascript that you can read and set breakpoints in, check out my first screenshot for what you are used to seeing:

In my second screenshot, I have drawn an arrow pointing to the prettify tool that will take that script and turn it into this:

Good utility to mask your HTML input masks

November 15th, 2012 by admin No comments »

I wanted to give a little shout out to a little tool written by a guy named Josh Bush, you can find it here: http://digitalbush.com/projects/masked-input-plugin/. Basically it will mask your input fields and only allow numbers, letters, a combination of both, and also insert your characters in there if you want. I especially like the ability to have optional amount of characters in your input by using the ? in your mask like so, $(“#phone”).mask(“(999) 999-9999? x99999”), this allows the user to not have to put in those extra characters, like in this example, the extension.

Go check it out, its only 4k minified, so very small in your app. I went down the road of writing my own functions to validate my client side controls but found that only allowing the right data to be entered into the controls was an even better step. I hope this helps someone.

How to debug using jsfiddle

November 12th, 2012 by admin No comments »

Here is a little known feature of jsfiddle that you may not have known about that comes in very handy when you are using jsfiddle.net to create your javascript mockups. If you just insert into any point in your code the keyword debugger; it will break on that line, this even includes templates!! Check out the fiddle I created here http://jsfiddle.net/eddie_d_2000/wVzj7/ to see what I am talking about, to see the fiddle in action, all you have to do is right click in the window in chrome or firefox and inspect the site or get your developer window open and jsfiddle will take care of everything else. I hope this can help someone!

Creating a grouped tablerow using Twitter Bootstrap and Backbone Marionette

November 9th, 2012 by admin No comments »

I have been working on a project where I need data grouped or summarized by date, and I wanted to make use of Backbone and Marionette with its CompositeViews and ItemViews so I whipped up an example, check it out below

It makes use of a Marionette CompositeView to create a table and then takes that and an ItemView to create rows that are wrapped with the Twitter Bootstrap accordion control to do the collapsing of the rows, how sweet is that??

If you are a Web Developer, JSFiddle is your friend!!

November 9th, 2012 by admin No comments »

If you surf around on the web much, I am sure you have come across a JSFiddle, or basically a code example online, here is an example of one I have been working on, http://jsfiddle.net/eddie_d_2000/Wwjz9/. I have been putting off using it for the longest time but last night I sat down and created an account and I can’t believe I didn’t use this tool long ago. You can pretty much do anything you want if you want to mock up web UI’s. If you need js libraries, just include them on the left using the “Manage Resources” link, you just reference the js library you want and it will include it and start using it with your code. This is a great tool to mock stuff up and send to co-workers or just place on blogs like this one. It has all the popular frameworks already included, all you have to do is check them off and it will start using em. It look like it will even simulate calls to the server, which I have yet to use but I will probably be testing that out in the future. So go ahead and create an account, its free and apparently accounts are limited, so you may want to hurry up, happy coding!!

How to get lost windows back on Windows 8

November 8th, 2012 by admin No comments »

If you are like me you have at least one monitor hooked up to your work computer or you have dual monitors setup. Either way, in my case I have a monitor hooked up to my work laptop via HDMI connection and I had it launching on the secondary monitor. I took my laptop home tonight and fired it up and Visual studio and lo and behold my applications window was nowhere to be seen, just the icon of it down on the windows 8 taskbar. In windows 7 you could just right click on that icon and then choose “Move” and then depending on where your other display extended, right or left, you could just press the arrow opposite that direction and in a couple of seconds your window would be back where you want it. Well in Windows 8 right clicking on an application in the task bar only give you choices to either close the app or pin it to the taskbar, which does me no good. What I found is if you just simply do an ALT-Tab or ALT-Space it will bring up the menu to choose “Move” and you are back in business, I hope this helps someone.

Add GZip compression to your asp.net site

November 5th, 2012 by admin No comments »

I have been recently looking at ways to speed up performance on my website and I came across GZip compression, which is a great way to compress your javascript and css files before they come down to your system. A few of the benefits of this method are:

You can control what files are compressed.
Bots / SE spiders will crawl your pages faster than before
Decrease Bandwidth

Of course there is the drawback of the performance hit your server will take by running the compression on your files as they are being served, so you have to weight that into consideration as well. I have put below the code you have to add to your web.config file to get it going with asp.net, it goes in the section, enjoy:

01<httpCompression directory="%SystemDrive%inetpubtempIIS Temporary Compressed Files">
02      <scheme name="gzip" dll="%Windir%system32inetsrvgzip.dll"/>
03      <dynamicTypes>
04        <add mimeType="text/*" enabled="true"/>
05        <add mimeType="message/*" enabled="true"/>
06        <add mimeType="application/javascript" enabled="true"/>
07        <add mimeType="*/*" enabled="false"/>
08      </dynamicTypes>
09      <staticTypes>
10        <add mimeType="text/*" enabled="true"/>
11        <add mimeType="message/*" enabled="true"/>
12        <add mimeType="application/javascript" enabled="true"/>
13        <add mimeType="*/*" enabled="false"/>
14      </staticTypes>
15    </httpCompression>
16    <urlCompression doStaticCompression="true" doDynamicCompression="true" />